Photography Technique #1
This post is about Double Exposures with the use of film.
There are many ways to create double exposures, either in the shooting process or in the darkroom.
How do I shoot double exposures ?
They can be easily created depending on your make of film camera.
If your camera is fully manual and made out of metal (this is common in most old style 35mm SLR's) then follow the first set of instructions.
However if your camera is a more modern film camera (that has automatic feature's ) then follow the second set of instructions.
What film to choose ? Image: 3 Fujifilm films two colour (left) one B+W
(right)
Select a film you wish to use, make sure you choose a reasonable ISO. For Example ISO's 100-400 are usually suitable for double exposure photography. For these tutorials we will use ISO 400 as an example ISO. You can use either colour or Black and white film.
Note: ALWAYS read your instruction manual before to find out if your camera manual tells you how to create double exposures.
Fully Manual SLR's
With fully manual cameras you have two ways of taking double exposures. But before you can starting taking your shots you need to increase your ISO by a stop, for example ISO 200 will become ISO 400, or ISO 400 will become ISO 800 this allows you to have two frames evenly exposed in one frame. Also by doubling the ISO this halves how long the film is exposed for.
The best way of shoot double exposures is too shoot a whole roll of film at the higher ISO then eject the film when you have wound it back, but instead of winding all of the film into the canister leave the film leader out so you can then re load the camera with the same film!
WARNING!: Some cheaper films MAY rip on the second set of exposures!
So now that you have shot the roll of film at the higher ISO, KEEP the same ISO setting for the second time and shoot the roll again.
Now rewind the film back into the canister and process the film. With this method you may find that some of the images are out of alignment this can be fixed with some careful cropping.
To the right is an example of a double exposure taken with a Canon AE-1 Program, with Kodak film 200.
Top Tip: If you have your own scanner ask the processing labs not to cut the film this allows you the ability to line up the frames your self. with out someone else that could cut them wrong.
More Modern Film SLR's
If you don't have a fully manual SLR but you do have a SLR that has more features, such as automatic winding, or Automatic modes, then there is a good chance that you camera has the ability to take multiple exposures with out having to shoot the film twice.
To the right is an image of a Canon EOS 300
Now depending on your camera the settings will be different so always read your manual for more information.
If your using a Canon EOS 300 then here is how to do double exposures (most canon EOS film SLRs have the same way.)
Step 1: load your film
Step 2: Now double your ISO. for example: From ISO 200 to 400, or from ISO 100 to 200. (refer to your manual on how to do this)
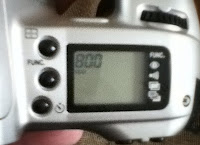
Step 3: on the canon EOS 300 there is a FUNC. button (function) press this till the arrow is pointing at
this symbol:

.jpg) Step 4: using the dial ( that you use to change your settings such as shutter and aperture settings) and set it too 2, you can go up-to 9 but try two to begin with and feel free to experiment.) this stops the film from advancing to the next frame and will re set when you have took your two shots.
Step 4: using the dial ( that you use to change your settings such as shutter and aperture settings) and set it too 2, you can go up-to 9 but try two to begin with and feel free to experiment.) this stops the film from advancing to the next frame and will re set when you have took your two shots.Step 5: Set your camera to Manual, Shutter/Aperture priority or Program. Take your two shots.
 Step 6: Always remember this! when you adjust your ISO adjust it back when you have finished! and if you want your next shoot to be a double exposure remember to set the double exposure setting again.
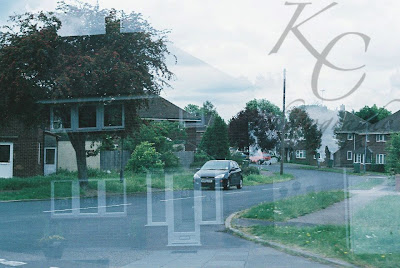
To the right is an example of a double exposure taken with the Canon EOS 300 with Fujifilm ISO 400 film.
I hope this quick tutorial helped!!
This is just one of a series of tutorials I plan to do such as:
- Photoshop Tutorials
- Lightroom Tutorials
- Photography Techniques
and more!
IF you liked this blog post please like my Facebook: www.facebook.com/PhotographyKC
All images were taken by me!
If you have any questions Tweet me at: @Kieran28051993
Leave a comment! and share with your friends
thank you for reading
Kieran
KC Photography


.jpg)
This is exactly what I was looking for!
ReplyDeleteThank you!
Yay, another avantage for my 300 compared to my 450D. I am looking forward to my results :D
ReplyDeletethank you!
ReplyDeleteThank you very much! I feel ashamed that I had the Canon eos300 for a year and had no clue that I had this feature
ReplyDelete
ReplyDeleteThis site is really cool! I found here alot of information that I was looking for. I am really happy to be a part of This site! todaylifesdiarie
Everything looks fantastic.Amazing i m really impress with your content and very useful it top10reviewsil
ReplyDelete